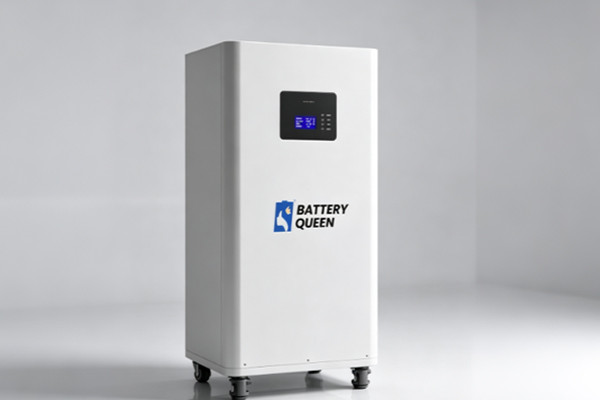
During the assembly of a DIY battery holder, soldering quality directly affects connection stability, electrical conductivity, and operational safety. Poor solder joints, excessive temperature, incorrect wiring, or inadequate insulation may cause the battery holder to overheat, make poor contact, or even short-circuit. When building or modifying one yourself, you also need to consider the cell type, connection structure, wire specifications, and protection circuit. Following proper soldering methods and inspection procedures can help improve the reliability of the battery holder.

Prepare Materials Properly Before Soldering
Preparing suitable materials and tools in advance can reduce operating errors and improve connection quality.
Confirm the Specifications of the Battery Holder and Cells
Before soldering, confirm the internal space of the battery holder and the cell dimensions according to the intended application. During preparation, pay attention to the following:
- Confirm the cell model: Select cells that match the required voltage, capacity, and dimensions.
- Check the terminal positions: Confirm the positive and negative connection directions and the terminal layout.
- Verify the number of connections: Series and parallel configurations require different connection methods.
Matching the specifications can prevent size mismatches or polarity errors after assembly.
Prepare Suitable Soldering Tools
Different connection materials require different soldering methods, so tool selection should be based on the actual structure.
- Soldering equipment: Select suitable equipment according to the connectors and soldering materials.
- Connecting wires: The wire cross-sectional area should match the expected operating current.
- Insulation materials: Prepare heat-shrink tubing, insulating sheets, and other materials to protect exposed connection areas.
Adequate tool preparation can make the assembly process of a DIY battery holder more standardized.
Focus on Connection Quality During Soldering
During soldering, pay attention to both the mechanical strength and electrical conductivity of the connection points.
Control Soldering Temperature and Time
For battery holders containing cells, improper soldering heat may transfer into the cells. Pay particular attention to the following during operation:
- Avoid prolonged heating: Reduce heat concentration in one location.
- Control the soldering energy: Adjust it according to the connection materials and equipment parameters.
- Minimize repeated soldering: If a solder joint is abnormal, analyze the cause before reworking it.
Properly controlling heat input helps reduce the risk of cell overheating and connector damage.
Ensure Strong Solder Joints and Stable Conductivity
A solder joint that looks complete does not necessarily provide a reliable connection. During inspection, check the following:
- Whether the solder joint is secure: Avoid looseness, detachment, and similar problems.
- Whether the connection area is sufficient: Reduce localized heating caused by an insufficient contact area.
- Whether the solder joint surface is abnormal: Reinspect if you find burn marks, cracks, or other defects.
Stable solder joints can reduce contact resistance and improve the reliability of current transmission.
Do Not Neglect Wiring and Insulation
After soldering, proper wire routing and insulation can reduce wire strain and accidental contact between conductors.
Select Connecting Wires Properly
Wires carry the operating current, so their specifications must match the actual load.
- Select wires according to the operating current: Applications with higher current require appropriately sized wires.
- Control wire length: Reduce unnecessary wire length and additional voltage drop.
- Inspect the wire insulation: Replace wires promptly if they are damaged, aged, or exposed.
Suitable wires can reduce heat generation in the circuit and improve connection reliability.
Strengthen Insulation Around Solder Joints and Exposed Areas
After soldering, insulate areas that may come into contact with other conductors. Heat-shrink tubing, electrical tape, or dedicated insulating structures can be used to cover exposed conductors. At the same time, check whether there are areas inside the battery holder where friction may occur. Proper insulation can reduce the risk of short circuits.
Conduct a Thorough Inspection After Soldering
Inspecting the assembly before powering it on can help identify polarity errors, short circuits, and connection problems in a timely manner.
Inspect the Appearance and Mechanical Connections
A visual inspection can help identify obvious assembly problems. Pay particular attention to the following:
- Solder joint condition: Check whether the solder joints are loose, cracked, or visibly abnormal.
- Wire fixation: Confirm that the wires are not excessively pulled or compressed.
- Insulation condition: Confirm that exposed metal areas have been effectively isolated.
After completing the visual inspection, proceed with electrical testing.
Measure the Circuit and Polarity
Before powering on, use suitable measuring equipment to confirm the voltage and polarity at the battery holder output terminals. For complex battery packs, also check the series and parallel configuration according to the actual circuit. Conducting subsequent functional tests only after the measurements meet the design requirements can reduce the risks caused by incorrect wiring.
After completing the soldering of a DIY battery holder, it should also be maintained and rechecked according to the actual operating environment. Stop using it immediately and investigate the cause if any problem is found. During storage, avoid high temperatures, moisture, compression, and contact between metal objects and the output terminals. If the battery holder will not be used for an extended period, follow an appropriate storage method based on the cell type. Regular inspections and proper maintenance can extend the service life of the battery holder and reduce failures caused by aging or external damage.